

You can remove a photo background while preserving image quality when the source is sharp and well lit, and the subject stands out clearly from its surroundings. A background remover isolates the subject so you can keep it transparent or place it over a new background. Inspect fine edges before using the result.
For product catalogs, consistent results also depend on using the same visual standards across images and processing similar files together. This guide covers source-image quality, background choices, and practical ways to assess tools and workflows for catalog production.
Key Takeaways
- Choose a transparent, white, or custom background based on where the image will appear, then select an export format that fits the destination.
- Inspect fine edges and subject details after removal; clean source images help preserve a clear result.
- Set consistent background and framing standards before processing a product catalog to keep listings visually aligned.
- Match each image task to the right tool, from background removal to format conversion and WebP generation.
How can I automatically remove and replace a background with a new one?
A background remover separates the main subject from its surroundings by detecting edges, such as a product outline or portrait, and creating a cutout. You can then place it on a different background. Choose transparency, white, or a custom color to suit the image’s intended use.
Common input formats include JPG, PNG, and WebP. Upload limits vary by tool, so check the displayed limit before choosing a large file. To keep a transparent background, export as PNG: PNG supports transparent pixels, while JPG does not.
- Upload: Select a JPG, PNG, or WEBP image with a visible subject, such as a mug against a plain surface.
- Remove: Run automatic removal, then inspect edges around details like handles, hair, or fabric.
- Replace: Keep the transparent background, choose white, or apply a custom color for the final visual.
A transparent background leaves the isolated subject without filling the empty pixels with a color. This makes a transparent PNG useful for placing a product in different layouts, adding a portrait to a design, or framing social images consistently. Open the export in a viewer that shows transparency as a checkerboard, rather than assuming a white preview means the background is solid.
For catalog images, use the same background and crop style across related products. White can suit a clean listing, while a custom color can match a campaign palette. For social graphics, a transparent PNG lets you layer the subject over a designed background. Open the exported file in your target app and check the edges and background before publishing.
Can I remove the background from an image without losing quality?
Yes, a clean cutout can retain the source image’s detail if you start with a sharp, well-lit photo and clear contrast around the subject. A background remover separates foreground pixels from the backdrop, but the result still depends on the original resolution, edge detail, and export settings. Avoid enlarging a small image or repeatedly compressing the export.
Hair, glass, and fine fabric edges can blend into nearby colors, making them harder to separate when the subject and backdrop are similar. Choose a more contrasting source when possible, then inspect strands, transparent objects, and outlines at full size. Correct visible halos or missing detail before placing the subject on a new background.
Replacing a backdrop changes an image’s context, not its ownership. For commercial or social use, use photos you created or have permission to use, and follow the applicable license terms. Removing a background does not grant commercial rights.
Batch processing and high-resolution downloads depend on a tool’s workflow and export options. For multiple product photos, keep the source resolution and background settings consistent, then review sample results before processing the full set. An API workflow also requires a tool that provides API access, so don’t assume it is available.
Privacy depends on how a tool processes and handles files. Browser-based editing does not automatically mean images stay on your device. Check whether processing happens locally or requires an upload, and review the tool’s file-handling practices. Cropping or resizing can also affect the final image, so inspect the export after editing.
How to choose a background and export format
Choose a background to suit the image’s destination. A product listing may need a plain white field, while a social graphic can use a branded color or layered design. For a portrait used in several layouts, retain transparency so you can choose the background later. One cutout can then work across different compositions.
A white background gives product photos a neutral setting and keeps attention on shape, color, and detail. Use a custom backdrop when the image needs to match a campaign palette or page design. Check contrast: a pale product can disappear against white, while a dark color may obscure its edges. Preview the subject against your chosen color before exporting.
Match the file format to the background and destination. Choose PNG for transparent pixels and later placement or layering. Choose JPG for an image with a solid background, such as a white product photo. WebP can work for web delivery when the destination supports it. Keep an editable transparent master, then export a separate version for each use.
- Transparent PNG: Select it for logos, portraits, or products placed over different layouts.
- JPG: Use it for a finished image with a solid white or custom backdrop.
- WebP: Choose it for a web asset when the publishing platform accepts that format.
Before downloading, preview the export in its intended setting. Check that the crop leaves room for a product title, the subject remains distinct at display size, and no unwanted color fringe appears around the edges. For a catalog, use one background and framing style across related items. Keep separate exports for a store listing, social post, and design file when their formats or backgrounds differ.
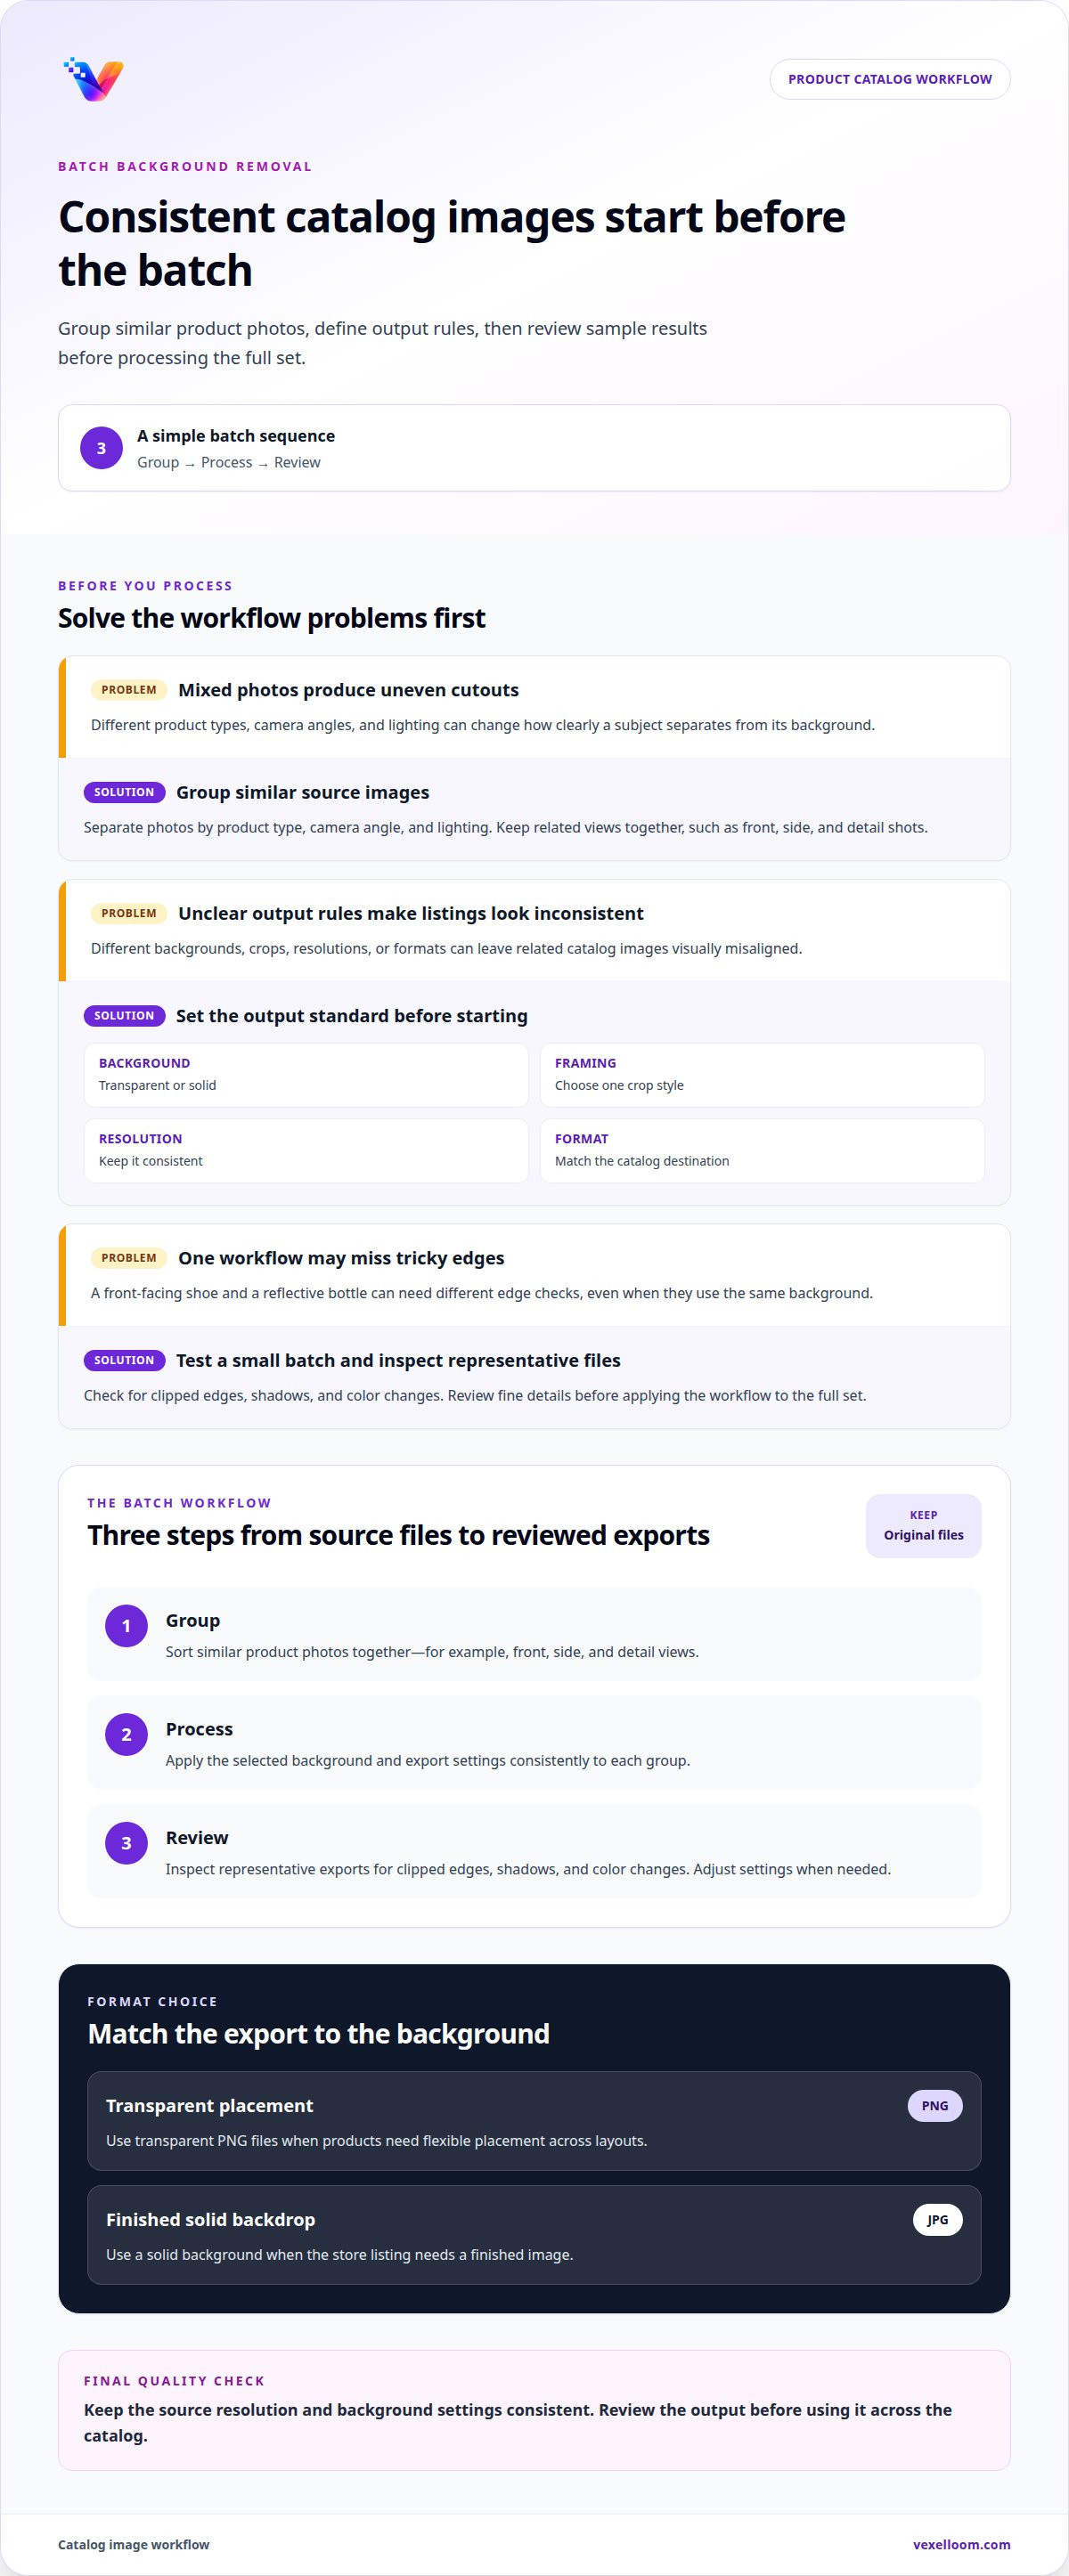
Batch background removal for product catalogs
Batch processing applies one background-removal workflow to multiple product photos, reducing repeated file handling. Consistent output still depends on consistent inputs, so group images by product type, camera angle, and lighting first. A front-facing shoe and a reflective bottle may need different edge checks, even when they use the same background.
Set the output rules before starting a batch. Choose a background, crop style, resolution, and file format to match the catalog destination. For flexible placement, keep transparent PNG files; use a solid backdrop when the store listing needs a finished image. Save the original files so you can compare results or rerun images with different settings.
- Group: Separate similar product photos, such as front, side, and detail views.
- Process: Apply the selected background and export settings to the group.
- Review: Inspect representative files for clipped edges, shadows, and color changes.
Test the workflow with a small batch first. Record the processing and review time, then use that result to plan larger catalog runs. Check fine details at full resolution, including zippers, clear glass, and fabric fringe. Keep a manual review step for images where automatic selection leaves artifacts. This helps catch errors before they spread across product listings.
Consistency matters beyond commerce. A set of staff portraits or a signature image for a signing workflow needs clean edges and stable framing. Keep these files separate from product photos because their crop and background requirements differ. In practice, batch similar images together, set export rules first, and review difficult edges before publishing the full set.
Vexelloom Studio: AI Background Remover
Vexelloom Studio offers four image tools for distinct production tasks: removing a background, converting files, generating WebP images, and preparing passport photos. Start with the required output, then choose the tool that fits the next step. This keeps each action focused on a specific image workflow.
Use Vexelloom Studio’s AI Background Remover to isolate a subject from its surroundings. This background remover creates a cutout for a transparent or replacement background. Inspect fine edges before using the result in another layout. It suits product images, portraits, and other visuals that need a different setting.
Batch Image Converter changes image formats across files. Use it when a set of assets needs conversion for a publishing workflow. Group images by destination, choose the output format, and keep the source files. Conversion changes the file format, not the subject or background.
Use WebP Generator Studio when you need to create WebP files for a site or platform that accepts the format. Keep a separate source copy, then review the generated file in its intended layout. This keeps format preparation separate from background removal.
Passport Photo Maker is for preparing an image for passport-photo use. Choose it for that task rather than treating a portrait like a product image. Follow the photo specifications for the destination: a catalog crop and an identity-photo crop serve different needs.
Standard image tasks run on devices with 2GB or more of RAM, including smartphones and Chromebooks. For a simple sequence, use the background remover, convert formats if needed, then generate a WebP file when it fits your workflow.
For questions about these image tools, contact Vexelloom Studio.
Frequently Asked Questions
What is the best tool for removing backgrounds from product photos?
The best fit depends on how product images enter your catalog workflow. Test a representative image from each product category, such as a reflective item and a fabric item, then compare how much review each result needs. Choose a background remover that fits your actual production steps, not just one that produces a clean result on an easy sample.
Can I use a background remover on mobile and desktop?
Yes, browser-based image tools can be accessed from mobile and desktop browsers. Choose a workflow that suits the screen in front of you: use a larger display when you need to inspect small subject details, and a phone for a quick, simple task. Confirm that the interface lets you preview the result before saving it.
Who is it made for?
Background removal helps anyone preparing images for a specific destination. A small retailer might need clean product assets, while a student could isolate an object for a class presentation. It can also help prepare a portrait for an online profile. Choose the workflow based on the image’s purpose and where it will appear.
What are the best tools for this task in 2026?
There isn’t one best choice for every image workflow. Start by identifying the task that takes the most effort, such as creating catalog cutouts or preparing assets for a presentation. Then choose a tool that handles that task and fits your workflow. Testing it with a typical image can show whether its controls suit your needs.
Which apps produce the best image quality?
Compare tools using a challenging source image, not only a simple subject against a plain wall. Inspect a portrait with loose hair or a product with narrow gaps, and review the result at its intended display size and at closer zoom. Edge defects that are hard to see in a thumbnail can stand out in a larger layout.
Which features should I compare when choosing a tool?
Compare the controls your workflow needs: subject selection, background options, preview, and export choices. If you prepare several images together, consider how the tool organizes the work. Check whether its interface makes poor cutouts easy to spot before saving. These practical checks help you choose a tool that suits the task.